S4 Wall Mounting
Once S3 Installation Placement is decided, fix the wall plate to the wall, hang the bracket and unit, then connect power.
4.1 Before you start
- Tape measure: set plate bottom height per S3 (tilt mount ~2.5 m)
- In the box: double-sided tape; optional expansion screws
- If using screws: drill, hammer in anchors, tighten with screwdriver
4.2 Fix the wall plate
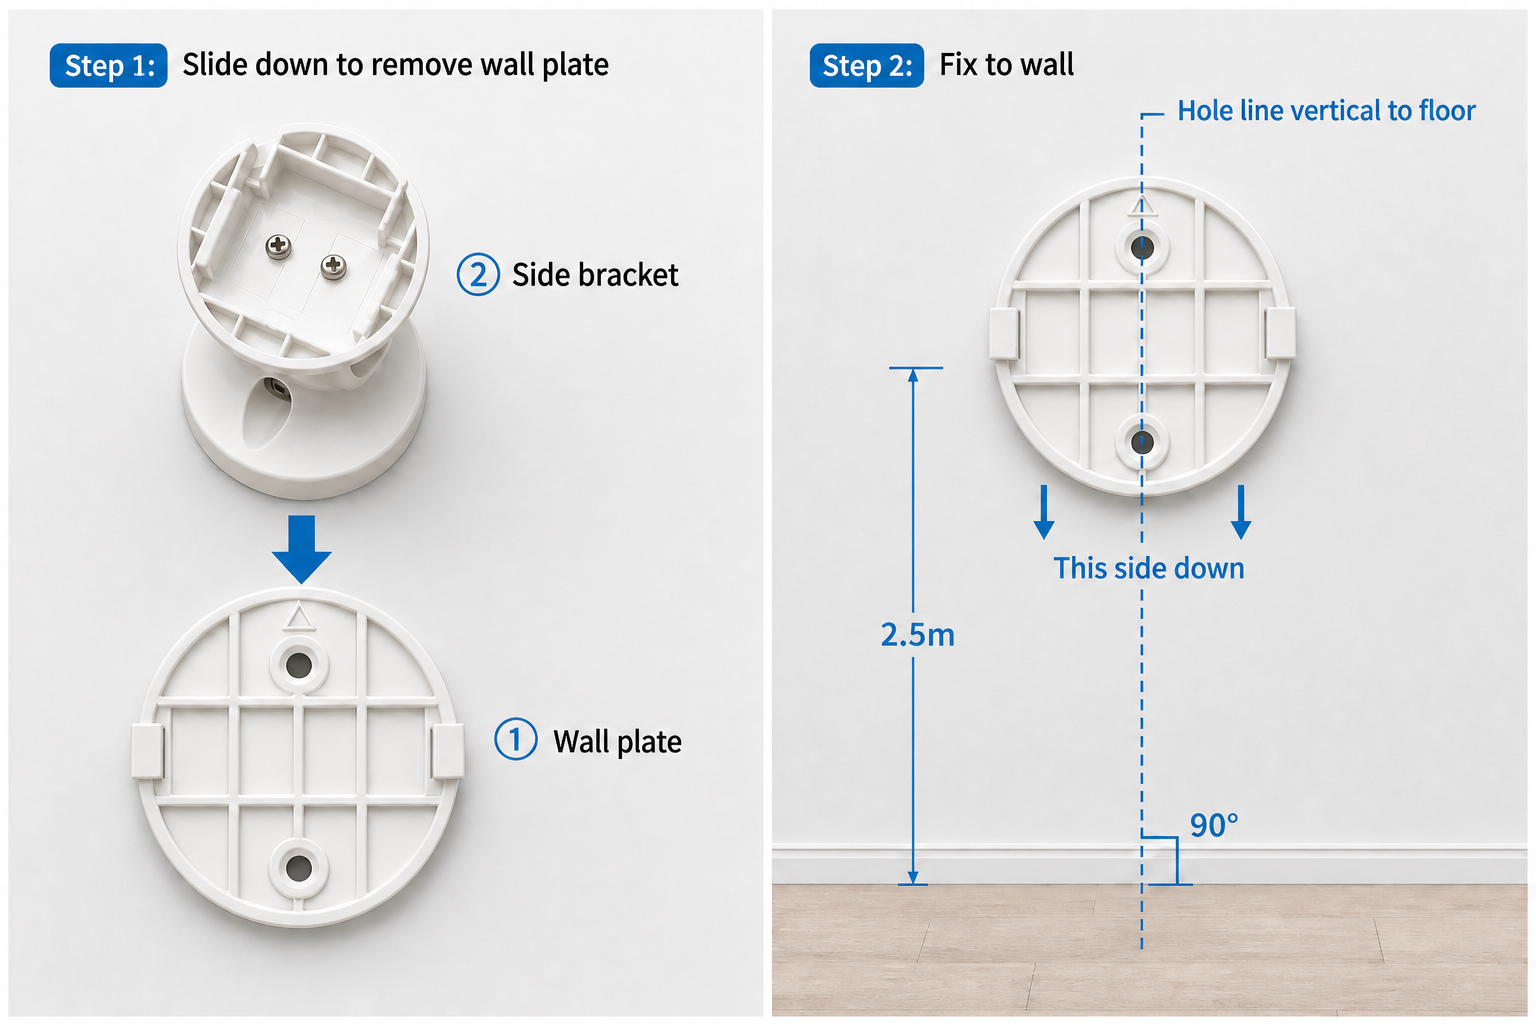
Step 1 — Remove plate
Slide the wall plate down out of the kit. The figure shows ① wall plate vs ② side bracket (already on the unit).
Step 2 — Fix to wall
Plate bottom edge at S3 height (tilt ~2.5 m). Side marked “this side down” faces down; line through the two holes must be vertical (no roll — see step 2 in figure).
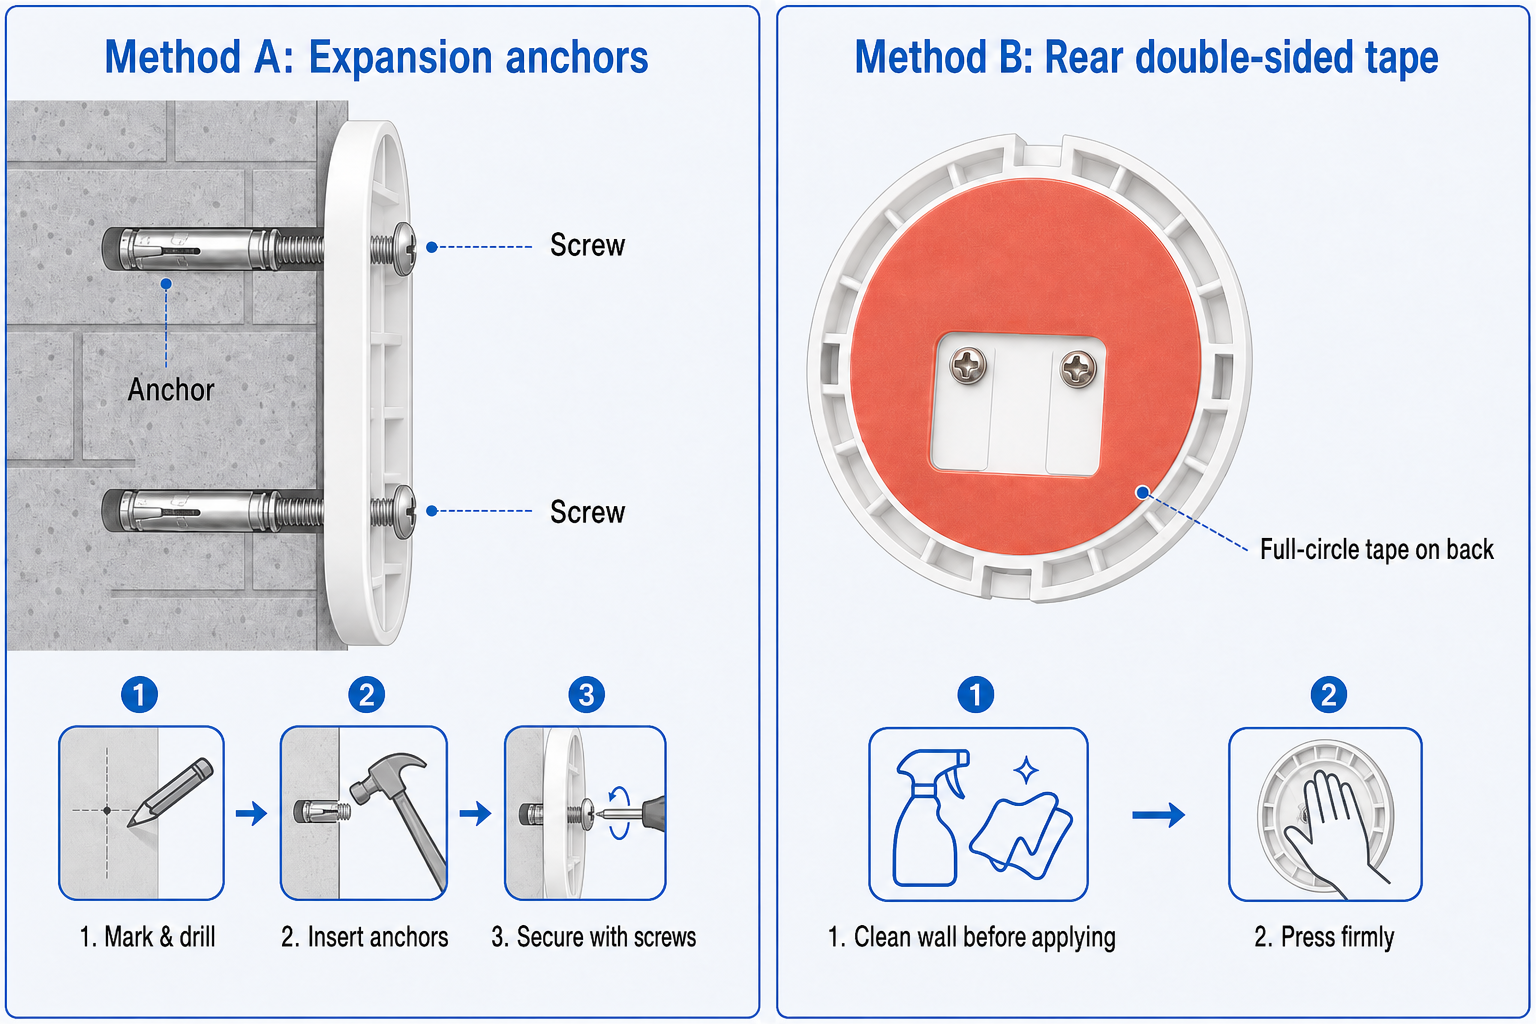
| Method | When | Notes |
|---|---|---|
| Double-sided tape | Smooth / drywall | Clean wall, press firmly |
| Expansion screws | Tape not holding | Drill → anchors → tighten |
⚠️ 注意
The plate cannot be realigned after fixing. Slight roll may be partially corrected in S5; obvious misalignment requires removal and refix.
4.3 Hang the unit
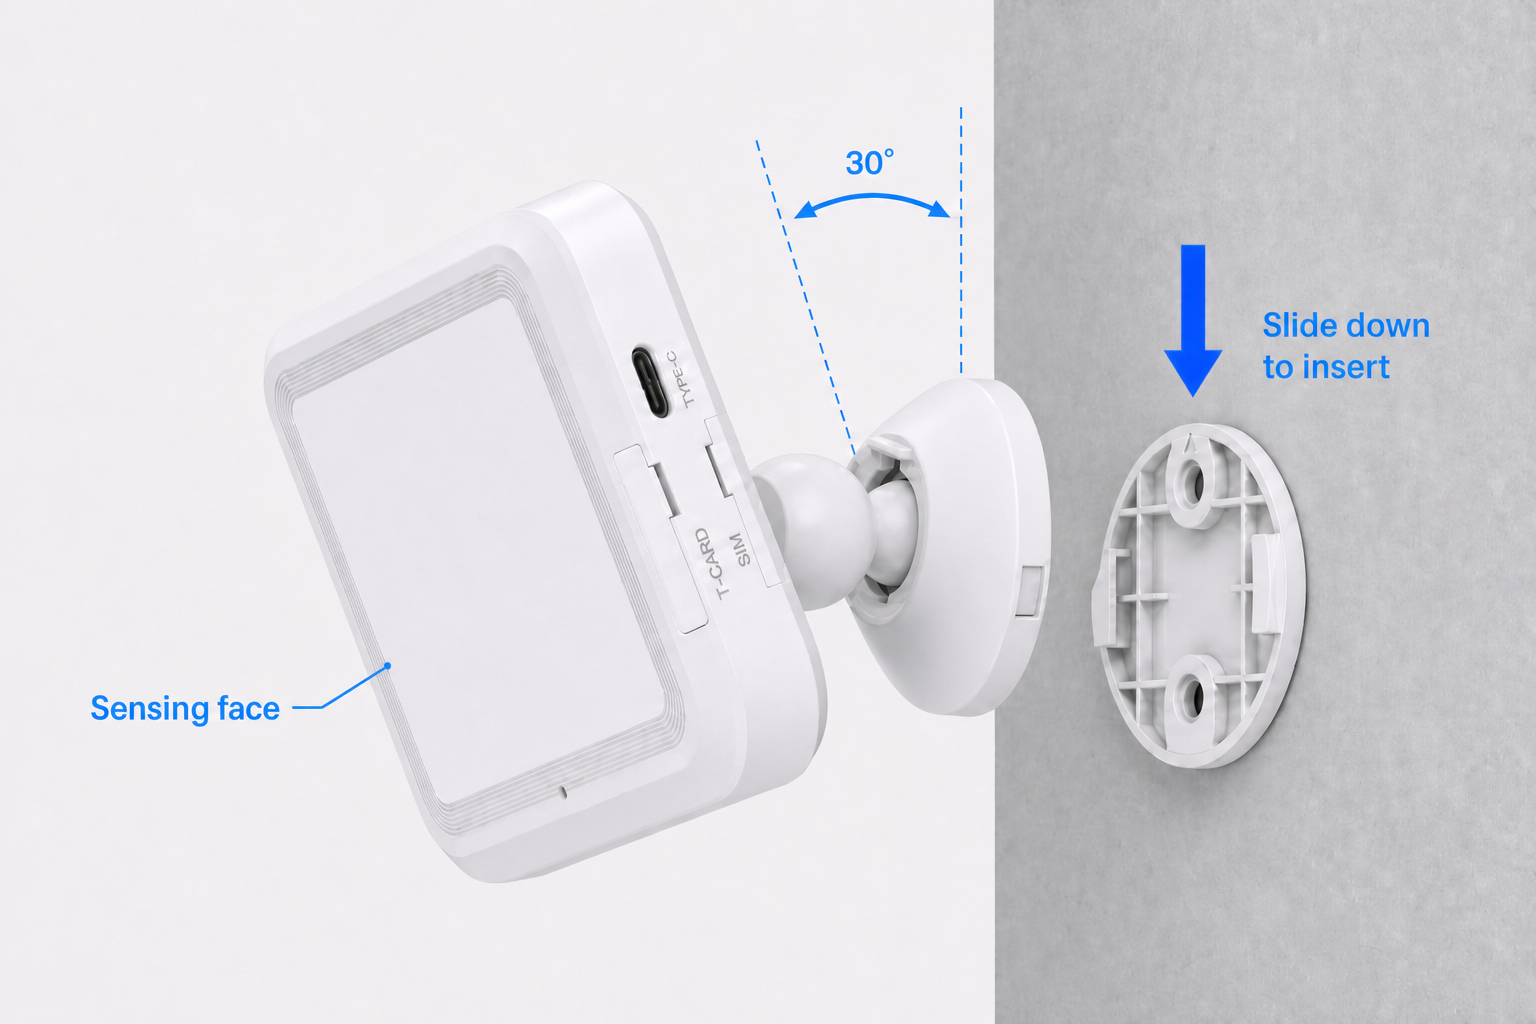
With the plate fixed, slide the bracket and unit down into the plate until locked.
White sensing face toward the room, back against wall, ~30° down-tilt on side mount, no left/right roll (see S3.2).
You may swivel ±45° horizontally to fine-tune coverage; down-tilt stays at 30°:
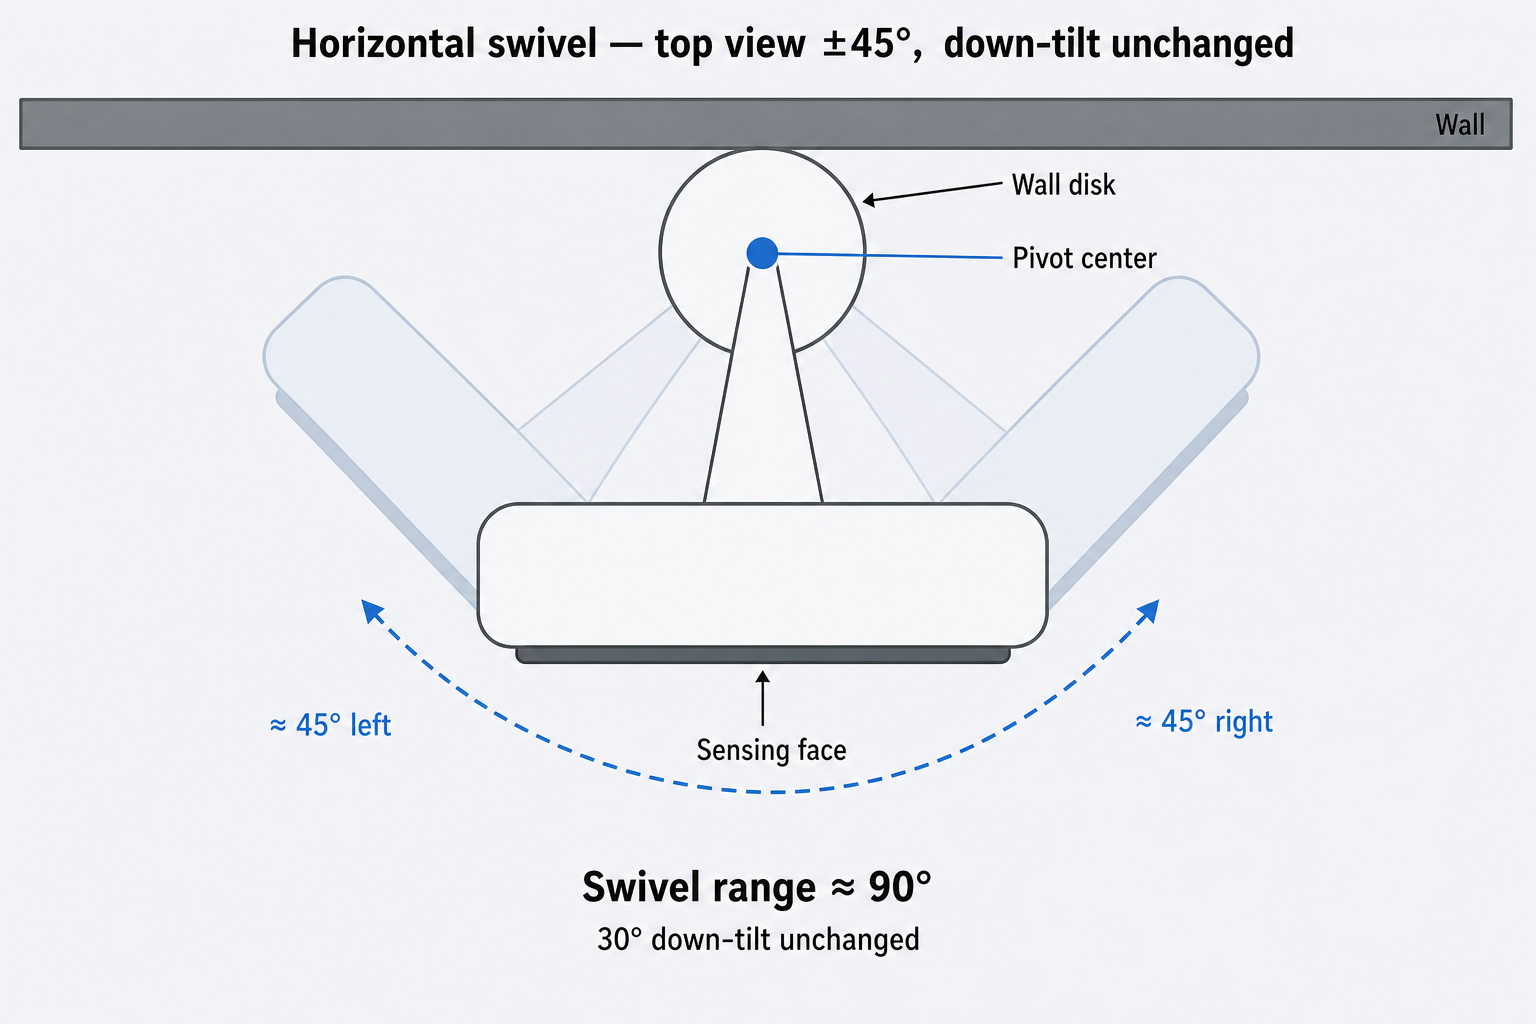
Connect 5V 2A Type-C (side or back). After 1+ min boot, LED off when running — S2.3.
4.4 Post-install checklist
- [ ] Wall and height match S3 (bedroom: foot-of-bed side wall)
- [ ] Plate holes vertical; unit not rolled
- [ ] After swivel, coverage includes bed and walkways
- [ ] Bracket secure; cables clear of sensing face
| Issue | Likely cause | Action |
|---|---|---|
| Bracket loose | Weak fix | Re-tighten or change method |
| Unit rolled | Plate not vertical | Slight: try S5 §5.3; severe: remove plate and refix |