S5 Self-Calibration
After install, if the Live avatar position or motion recognition is off, walk in the coverage zone so the device can fine-tune parameters.
Switch and Live UI → User Setup Guide (self-calibration switch & Live page, separate site).
5.1 Prerequisites
| Requirement | Notes |
|---|---|
| Install done | S3 Placement, S4 Wall mounting |
| Online | Provisioning per User Setup Guide; Live shows avatar/track |
| Params set | Height/tilt match site (30° tilt; 0° flat test) — set when adding device on platform |
5.2 What self-calibration does
When to use: Live position/posture is wrong or motion recognition is off, and the physical install is basically correct.
What it does: Walk in the S2.4 blue zone; the device adjusts height, angle, etc. from your path and posture, updating about every 10 s when effective.
What it cannot fix: It does not replace correct S3/S4 install. Severe mis-mount or wrong wall/height → reinstall S4 first.
Turn OFF when done
Disable self-calibration when finished. Leaving it on, or random walking, will drift parameters.
5.3 How to walk
One person in the zone preferred. Watch Live while you walk.
Steps
- Enable self-calibration on the platform (see User Setup Guide)
- Open Live and walk inside the blue effective zone per the points below
- Disable when §5.4 criteria are met
Walking tips
- Path: Walk an O-shaped loop on clear floor — circle the room and return, steady pace, don’t stand still.
- Cover as much as you can: Stay inside blue and off furniture, but make the loop as large as possible. The more open floor you cover, the more trajectory data the device gets — calibration usually works better.
- Avoid: Through beds; hugging bed/stool edges; red dashed furniture zones; multiple people in the zone.
- Open rooms: Also avoid the 0.5 m weak zone behind the radar wall (gray strip in Example 1).
| Do | Don’t |
|---|---|
| Large O-loop across open floor in blue | Tiny corner pacing; leave the zone |
| Use walkways between furniture | Through beds; under desks; next to metal |
| One person, steady walk | Stand still; multiple people |
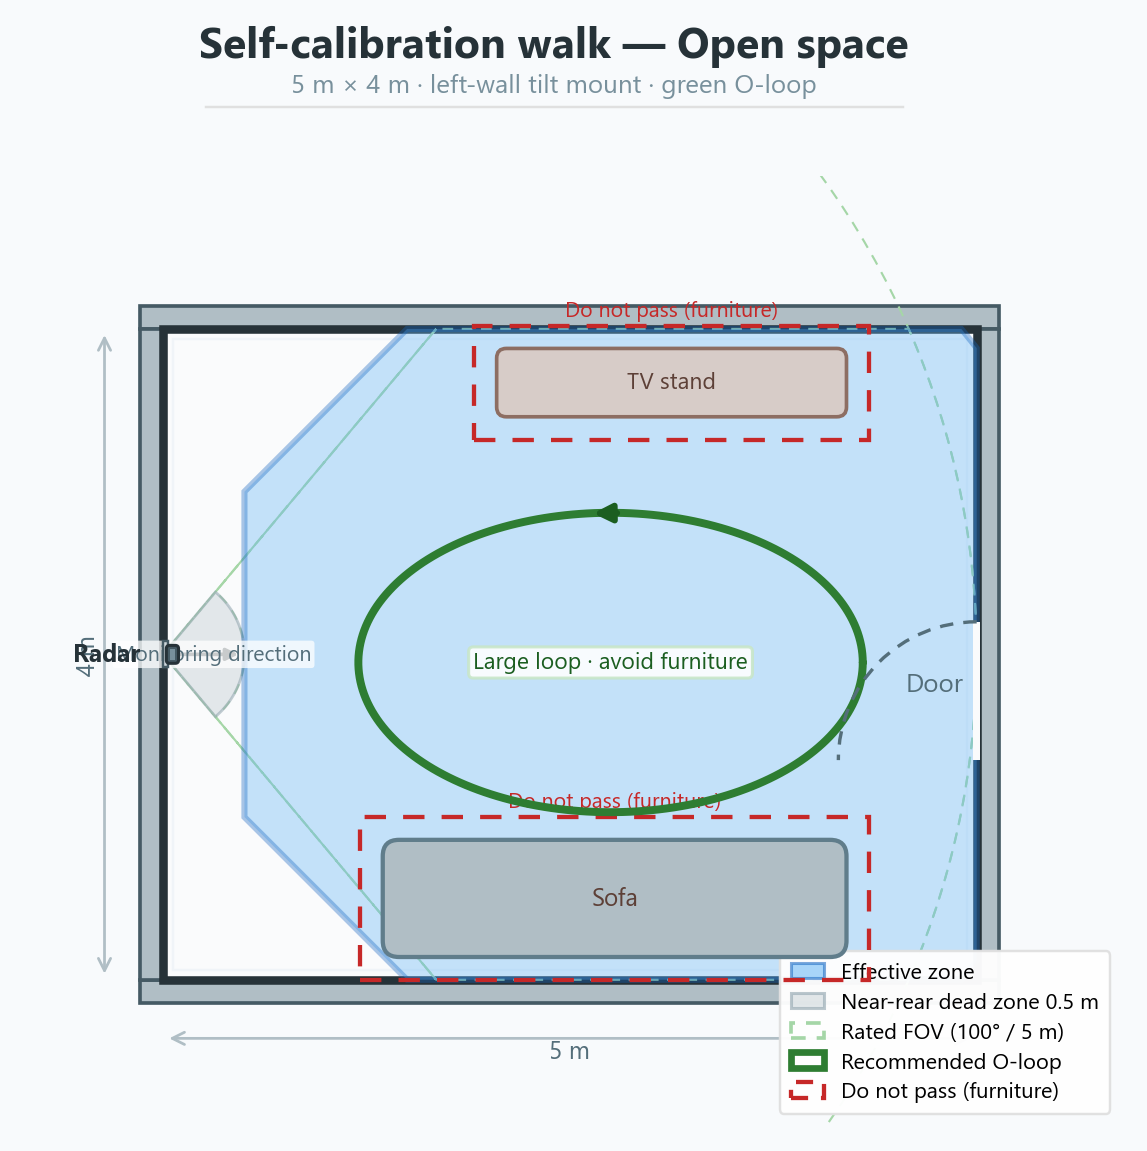
Example 1 — Open room
Blue = effective zone; green = recommended O-loop; red dashed = don’t enter around furniture.
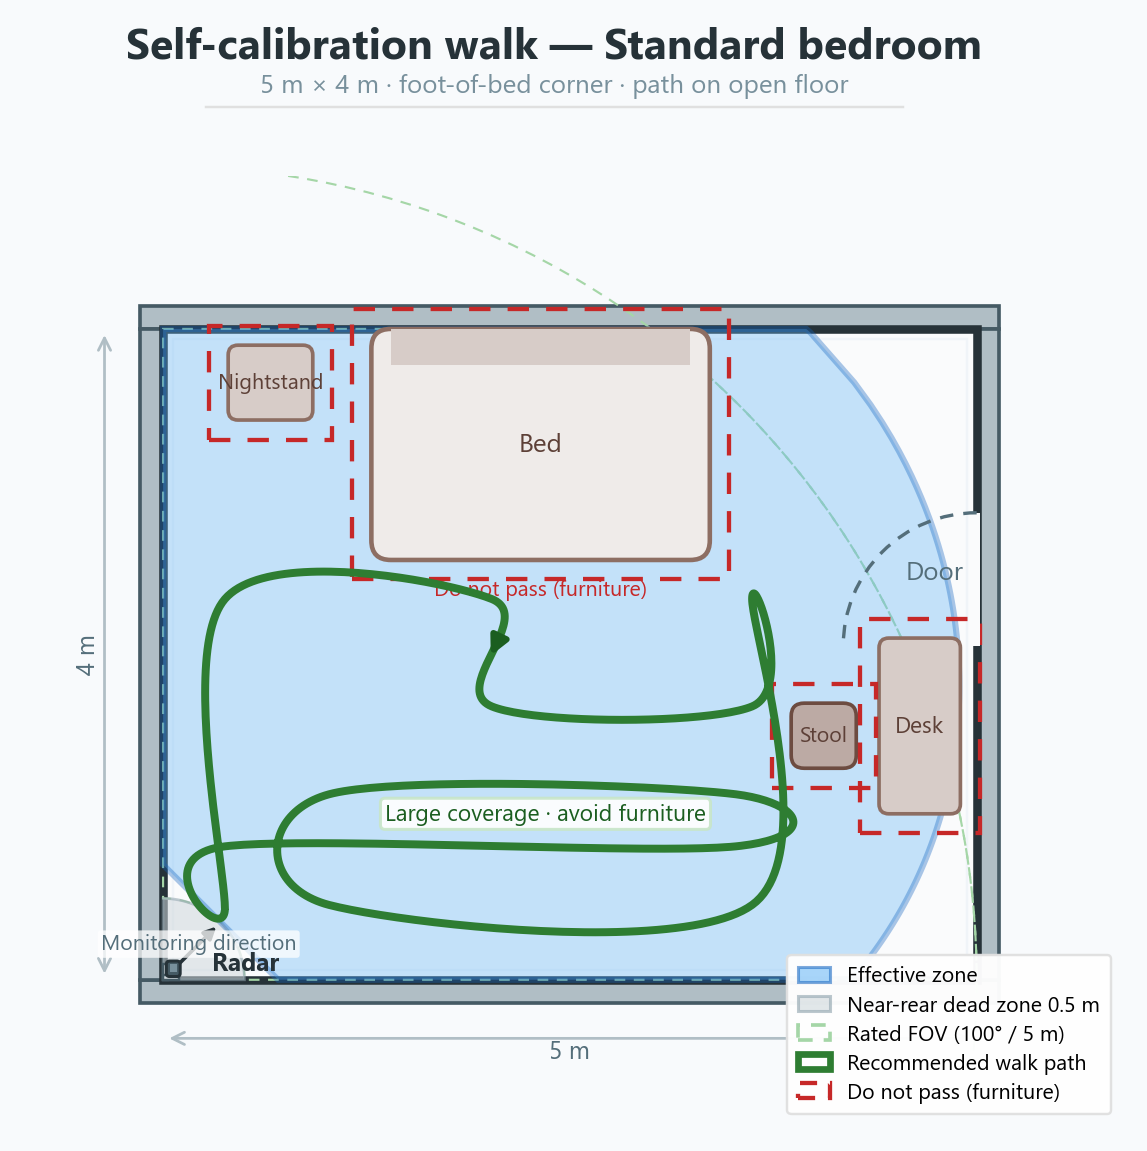
Example 2 — Standard bedroom
Same mount as S3.3 foot-of-bed side wall: radar at the side-wall corner; O-loop on open floor by the bed foot and room center — not through the bed.
Furniture doesn’t match the diagram?
Stay inside blue, make the loop as large as you can, and don’t cross furniture. Bedroom mount: S3.3.
Correct vs wrong
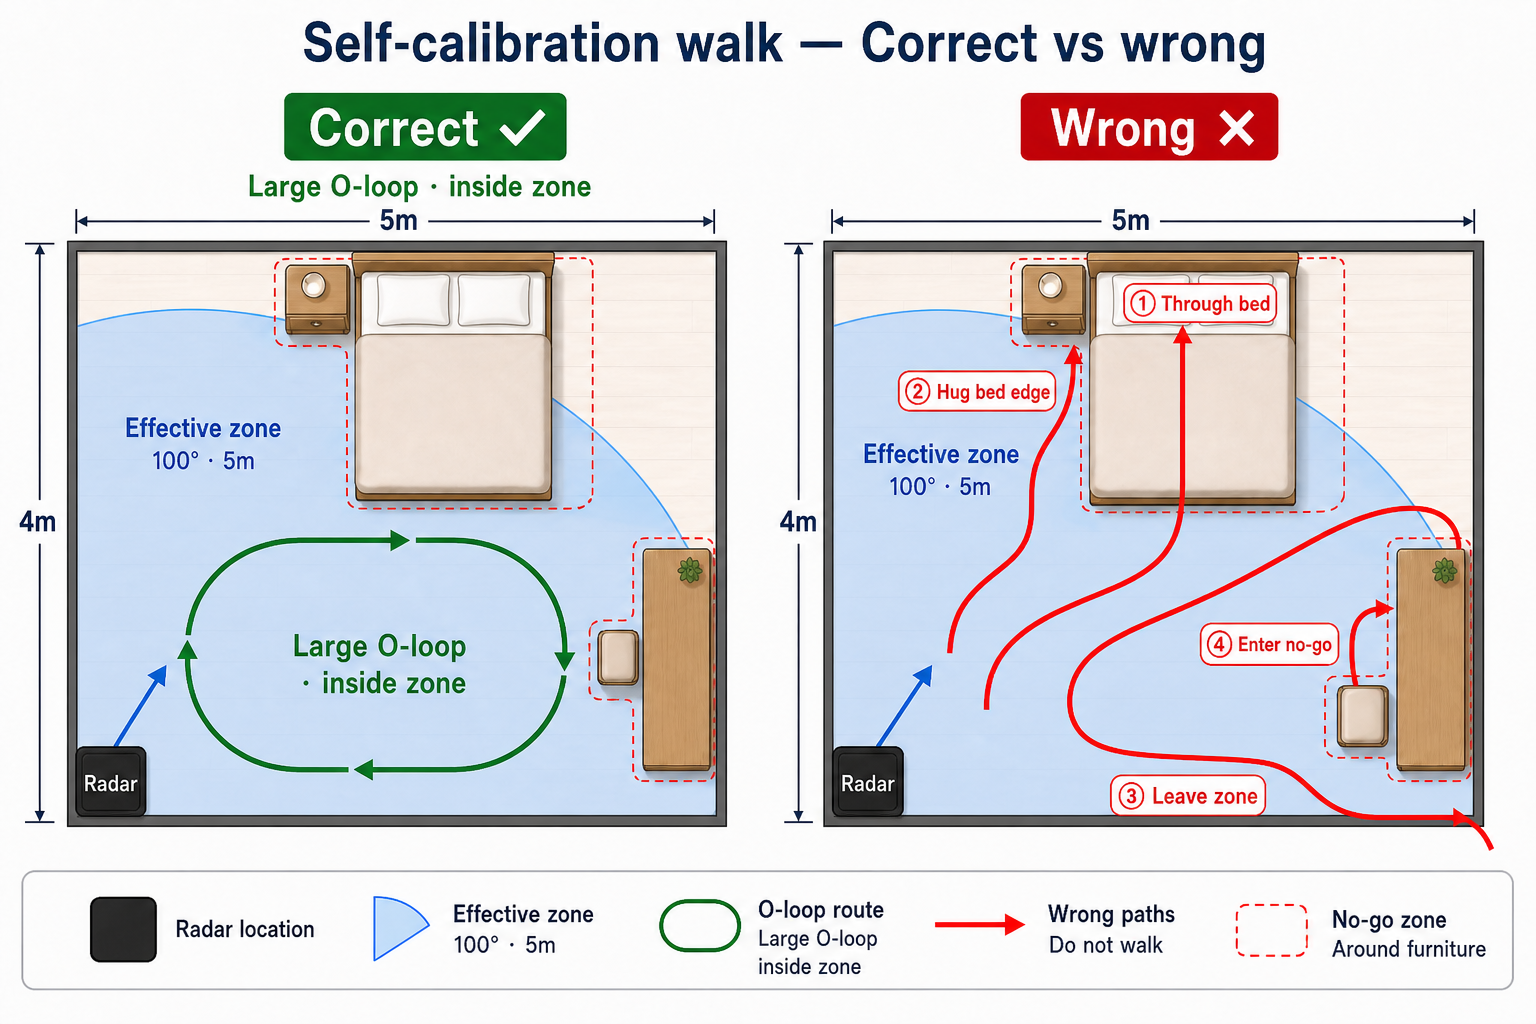
Same bedroom as Example 2. Left: large green O-loop on open floor inside blue. Right: red paths show through bed, hugging bed edge, leaving zone, entering no-go around desk/stool.
5.4 Validation and troubleshooting
You can turn OFF (check Live):
- Avatar stable, not tilted/drifting
- Walk/wave motion fine-grained
- Low false alarms; test fall detection safely on site
Still off?: Disable → edit height/tilt on platform (User Setup Guide) → check S3/S4, S6 → S10 FAQ.
| Symptom | Action |
|---|---|
| No avatar | Provisioning & params |
| Tilt/drift | Re-walk with a larger loop (§5.3); reinstall S4 if severe |
| Coarse motion / false alarms | Walk a bigger O-loop; move metal; check reflectors |
| Falls not detected | Manual params or reinstall |